Machine Continuous Embroidery in a Hoop You Tube
Welcome to Part 4 of my Embroider-Along. In Part 3 we discussed Needles and Threads, two of my favorite things. Hi, my name is Sue O'Very, BERNINA Ambassador and machine embroidery expert.T oday I will teach you about Placement and Hooping.
Placement and Hooping
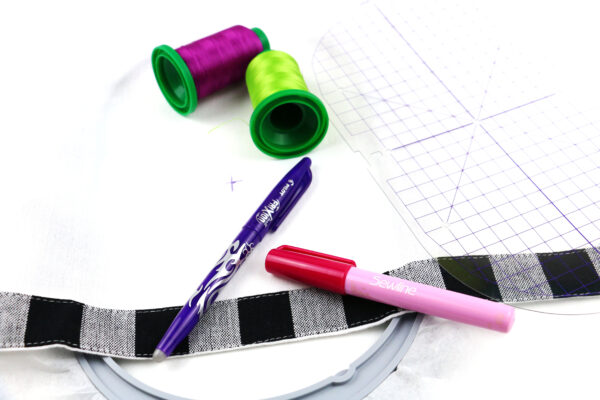
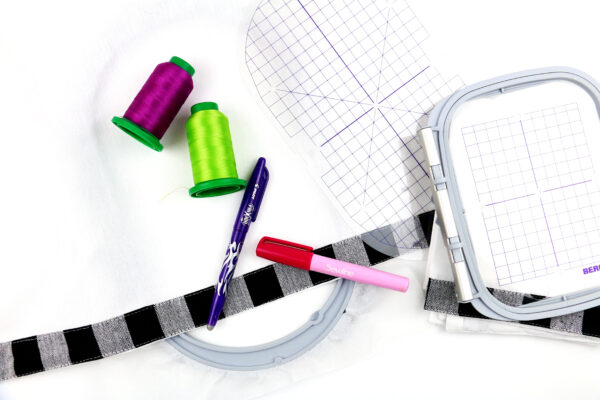
Today we will discuss the five components to get proper Placement and Hooping:
- Machine Embroidery Hoop
- Templates
- Marking tools
- Adhesives
- Hooping techniques
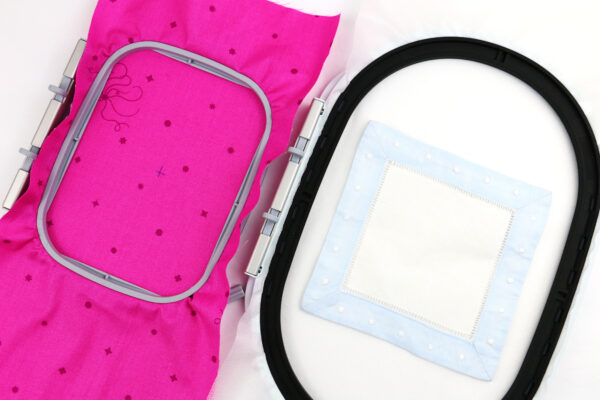
Machine Embroidery Hoop
In this section there are three important topics to cover:
- Embroidery Hoop Facts
- Embroidery Area vs Hoop Size
- Design size
Embroidery Hoop Facts
Keep in mind with machine embroidery hoops:
- Embroidery hoops have two parts
- Top (smaller Inside hoop)
- Bottom (larger Outside hoop)
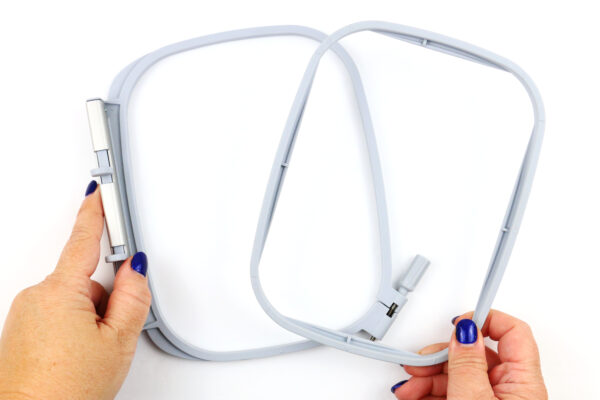
- Embroidery hoops are specific to brand and sometimes even unique to machines – ask your local dealer before you buy the wrong hoop
- Both parts of the hoop are marked
- Arrows
- Notches
- Hash marks
- Hoops will have some sort of tightening/loosening device
- Ergonomic Twist-Lock mechanism
- Screws
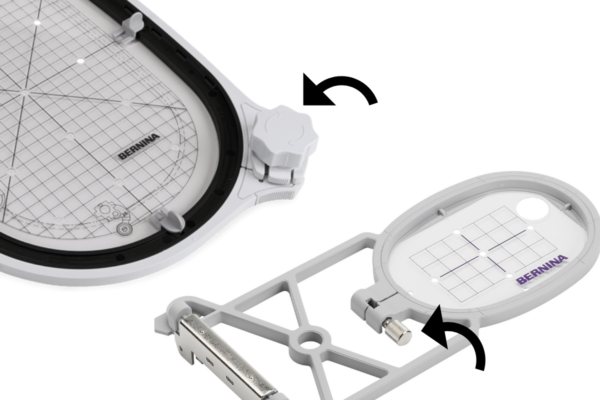
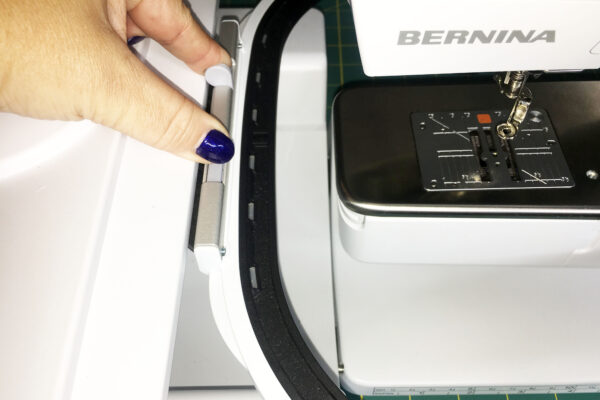
- Hoops will attach in one of two ways to the machine
- Clamps and locks
- Slide in
Embroidery Area vs Hoop Size
Before stitching a design it is critical to know what the machine size limitations are. A machine will only stitch up-to a certain size. You must know what the "Embroidery Area" is and it corresponds to hoop size.
The Embroidery Area is the largest continuous work space on your machine. The Hoop Size is how large the embroidery area is for that specific hoop. Most machines come with a couple of hoops, allowing you to decide which hoop is best suited for the project, i.e. baby socks with small hoop. The Hoop Size is not the measurement of the plastic frame, rather the embroidery area inside the hoop. For example, my machine is the BERNINA 790 Plus : It's largest embroidery area is 8.3″ x 15.7″ and it came with three hoops:
- Small – 72 mm x 50 mm (2.83″ x 1.96″)
- Medium – 100 mm x 130 mm (4″ x 5″)
- Large oval – 145 mm x 255 mm (5.8″ x 10.2″)
Notice the embroidery area (8.3″ x 15.7″) is much larger than the largest hoop (5.8″ x 10.2″) listed. In addition to the hoops included with my machine I decided to purchase two additional hoops. There is another hoop that is still on my wish list (the Hoop 'n' Buddyz" Hat hoop). The two hoops I decided to buy have allowed me to get more use from my machine and take advantage of that larger embroidery area.:
- Midi – 165 mm x 265 mm (6.5″ x 10.5″)
- Maxi – 210 mm x 400 mm ( 8.3″ x 15.7″)
What about your machine?
- What is your Embroidery Area?
- Which hoops do you have and which would you like to add to your collection?
Jot these measurements down in a notebook or your embroidery journal. These measurements will help in deciding which designs you can stitch on your embroidery machine.
Design size
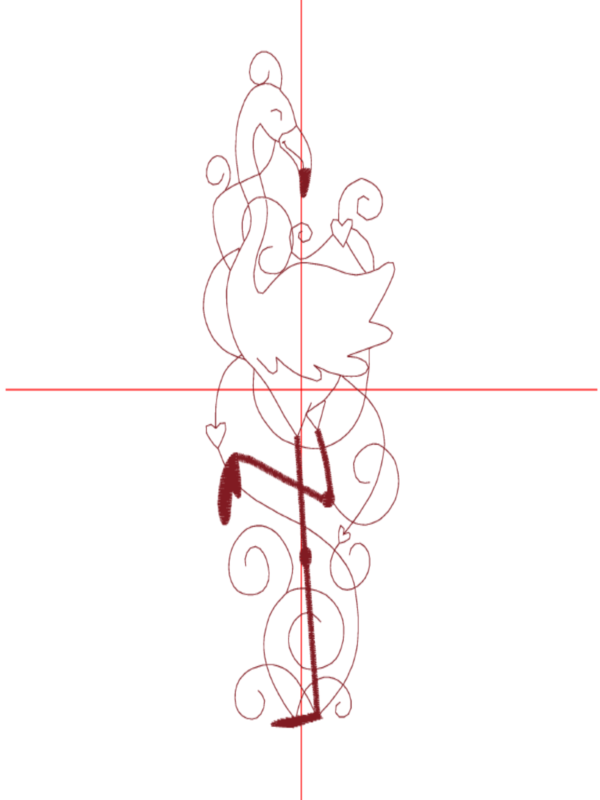
Now that you know what your Embroidery Area is you can purchase embroidery designs with confidence. Most designers will list the Hoop Size (for example: 4″ x 4″, along with the Embroidery Area measurement "1.6" x 3.9″). The Hoop Size gives the buyer an idea of which hoop is closest to the design size. For example, last week on the Embroider-Along Part 3 I gifted an Enchanted Flamingo embroidery design. The design was listed as 4″ x 4″ and 5″ x 7″ when in reality the designs are much smaller than those sizes:
- 4″ x 4″ actual embroidery area is 1.6″ x 3.9″ (I would use my Medium 4″ x 5″ hoop)
- 5″ x 7″ actual embroidery area is 2.7″ x 6.9″ (I would use my Large oval 5.8″ x 10.2″ hoop)
Which hoops will comfortably fit each design on your machine?
Templates
Now that you have an understanding on Embroidery Area, hoop size and design size let's discuss templates. There are two templates for machine embroidery:
-
Plastic templates
-
Printable templates
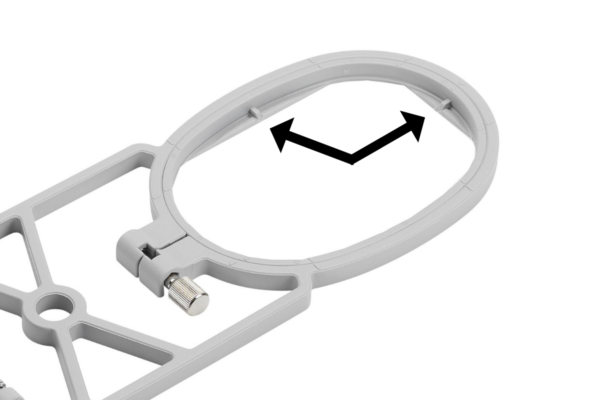
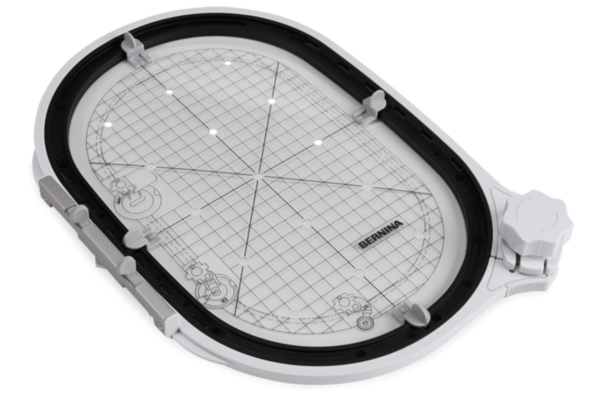
Plastic templates
Most embroidery machines comes with a couple hoops. Most of the hoops will come with clear plastic templates. These templates have notches so they fit into the hoop perfectly with little to no budge room. These plastic templates have grids and lines marking the center of the embroidery area. This will help you know exactly how where the design will stitch.
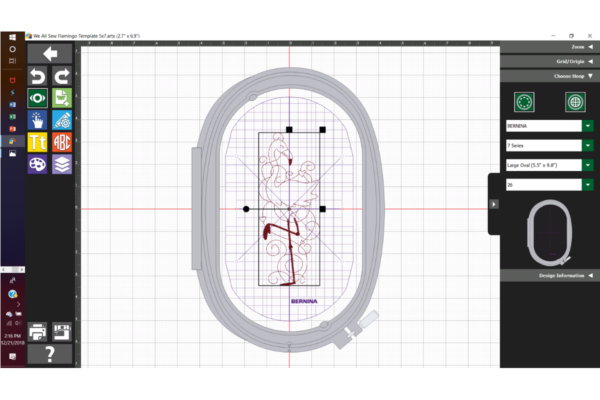
Printable templates
Unlike the plastic template, which only shows lines and grids, a printable template can show the actual design. Since most of us creative types are visual people, a printed template is a dream come true.
To print a template like the one above in actual size requires software. There are several software options and it could be overwhelming if you are new to machine embroidery. I would suggest to ask your local BERNINA Dealer. They can train and support you, answering any questions. Like many of you seasoned embroiderers I have been using software since the mid 90's. Like all technology software changes quickly! My recent favorite is BERNINA Toolbox. It is very user friendly and you can download a free trial. Be warned, you will fall in love with it.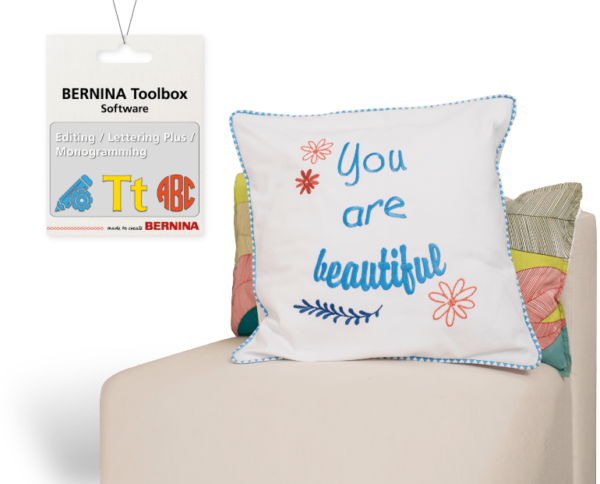
We are visual creatures and to see the design on your computers large screen ahead of time is both desired and invaluable. I was able to simply choose my machine, hoop size and immediately I could see the design in the hoop. Marvelous!
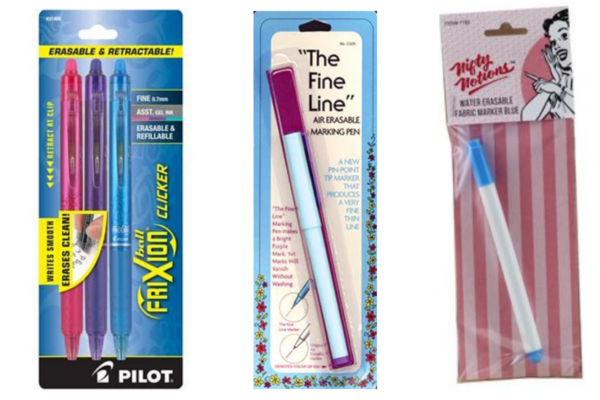
Marking Tools
Now that we have our template we need a way to transfer the marks to our material. These are my top three ways of marking, of course it will depend on the material. When in doubt, test the pen and removal on a small area.
- Heat removable (for natural fibers – avoid synthetic materials!)
- Frixion Gel or Highlighter
- Wash away (natural or synthetic materials)
- Wonder Water Erasable Blue
- Air erasable (good for materials you want to avoid washing or ironing)
- Fine Line Air Erasable Pen
Adhesives
Now that we have marked our materials we need to make sure the material and stabilizer will stay in place. Here are three methods of adhesives to keep a project in place:
- Tape
- Clear, i.e. Scotch tape
- Low adhesive, i.e. Painters Tape
- Wash away, i.e. Embroidery Wash Away Tape
- Spray, i.e. KK2000
- Fabric glue, i.e. Water Soluble Glue pen
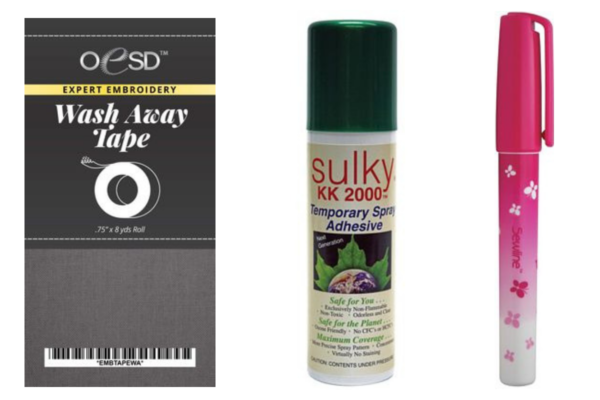
How do you choose which adhesives? This will be determined by your project, materials and type of hooping. We will dive more into that as the Embroider-Along continues in future post. Just like your marking pens, test the adhesive on your materials to make sure not to ruin them.
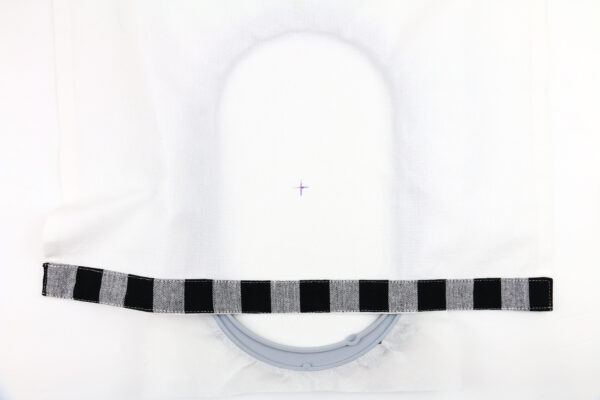
Hooping techniques
We have covered the basics for placement and hooping. Once you are comfortable with those, it's time to hoop your project. There are two ways to hoop:
- Hooping material and stabilizer together (with at least 1″ of material around the outside of the hoop)
- Hooping stabilizer only and floating the fabric on top (leaving 1″ of stabilizer around the outside of the hoop)
To determine which method to use, ask yourself these three questions:
- Is the project too small to hoop? i.e. Napkin corner, belt, ribbon
- Will the hoop leave marks on the material? i.e. Napped fabric like velvet
- Is the material to thick to hoop? i.e. vinyl, bathroom towel, leather
Hooping Material and Stabilizer
It's important to have at least 1″ extra material/stabilizer around the outside of the hoop. This way the hoop has something to hold on to and the material/stabilizer combo will not shift while stitching.

Hooping Stabilizer only
There are circumstance where hooping the material is not an option. The material may not be large enough (a cocktail napkin). It could also be the material is too thick (a bathroom towel) or the hoop can leave marks on the material (vinyl). When you are only hooping the stabilizer and floating the material/project on the stabilizer here are some things to keep in mind:
- Hoop stabilizer with at least 1″ extra on the outside of the hoop
- Use an adhesive to to secure the material to the stabilizer so it will not shift while stitching
- Make sure the material moves comfortably with the movement of the machine
What is next?
The first four parts of my Embroider-Along have been packed with the basics of machine embroidery. The next four parts will be the "How to" portion and with the knowledge you now have you will be ready! Be sure to sign up for the newsletter and come back each week to see what's new. You can also follow BERNINA on Instagram and Facebook to see the latest post!
Here is the Embroider-along schedule:
- Embroider-Along Part 1: Intro four most popular materials for machine embroidery
- Embroider-Along Part 2: Stabilizer and Materials
- Embroider-Along Part 3: Needles and Thread
- Embroider-Along Part 4: Placement and Hooping for Machine Embroidery
- Embroider-Along Part 5: How to Embroider on Knits
- Embroider-Along Part 6: How to Embroider on Woven Materials
- Embroider-Along Part 7: How to Embroider on Napped Fabrics
- Embroider-Along Part 8: How to Embroider on Sheer Materials
- Embroider-Along Part 9: How to Embroider on a Ladies T-shirt
- Embroider-Along Part 10: How to Embroider on a Pillow Case
- Embroider-Along Part 11: How to Embroider on Luxe Cuddle®Rose
- Embroider-Along Part 12: How to Embroider on a Pet Screen
Which is your favorite hoop? Which hoop do you want to add to your inventory? Let me know in the comments below and please ask any questions you might have about hoops. There is plenty of learning ahead of us. You have been asking excellent question so please continue to fill my inbox up with thoughts!!
Until next time I hope you have a creative day, bye-bye!
Sue
Source: https://weallsew.com/embroider-along-part-4-placement-and-hooping/
0 Response to "Machine Continuous Embroidery in a Hoop You Tube"
Enregistrer un commentaire